Showing posts with label homemade. Show all posts
Tuesday, March 16, 2010
a cuddly creature wall!
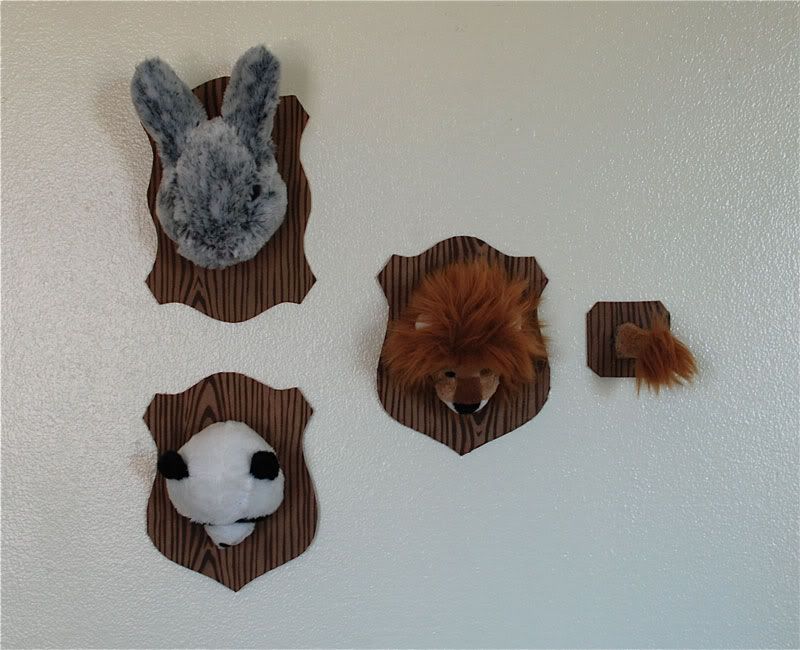
Benny and I have to admit, we have always secretly loved the rustic look of bear rugs and deer antlers/heads in a cabin setting. That being said, our admiration of such pieces has always been tainted by the fact that these decorations had once been alive and breathing. It's just a bit creepy, plus they always seem like they are staring at you plotting their revenge! So needless to say we were stoked to came across the idea (stolen from the super talented Megan Quirolo, check her amazing creations at the next $5 art praty!!) of taking stuffed animals and making them into a cute and friendly animal trophys!
Here is an easy little tutorial to help you make your very own creature wall! So head on down to your favorite toy store and "catch" yourself a cuddly lion or a plush panda or a fuzzy bear, anything really! All the How Tos after the jump...
Tuesday, March 9, 2010
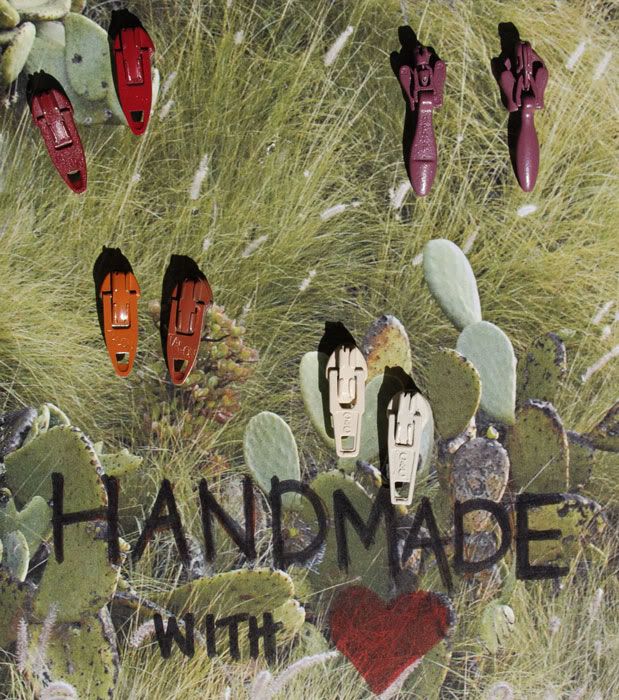
Homemade Giveaway...zipper earrings!
In celebration of March being the craftiest month of the year, benny and I have been crafting every chance we get. But this leaves us with a lots of awesome homemade goodies just waiting to be sent to a loving home. So as we promised, throughout the month of March we will be doing homemade giveaways every week!
To start things off we are giving away (2) pairs of our adorable vintage zipper earrings! To win email benny@bennykelly.com (subject: homemade giveaway) and tell us what your favorite crafty tool is. It's the #2 xacto for Benny and me! Include your name, address and 1st/2nd color preferences in the email. Two winners will be chosen and contacted on friday!
Check out more current giveaways from other crafty artists after the jump...
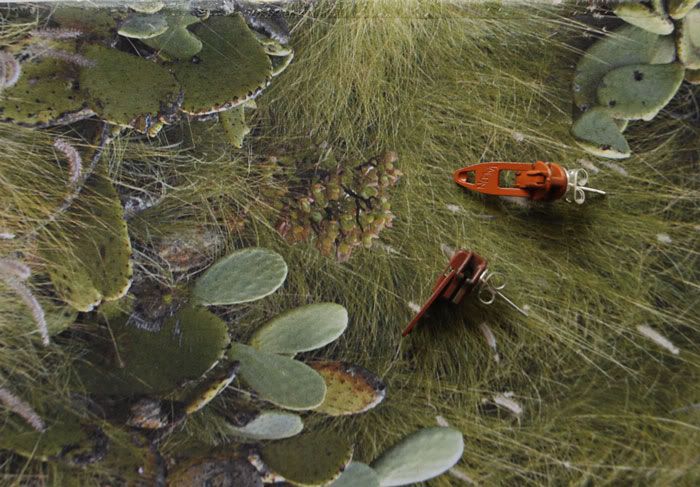
recycled zipper earrings
Last week for the $5 Art Party, Benny and I brought you some homemade earrings created from vintage zippers. We are really excited with how sweet they came out and since they were so easy to make we thought we would share how it's done. This is a perfect colorful and crafty accessory for spring or a little gift for your love! Enjoy!
All the how tos after the jump...
Wednesday, March 3, 2010
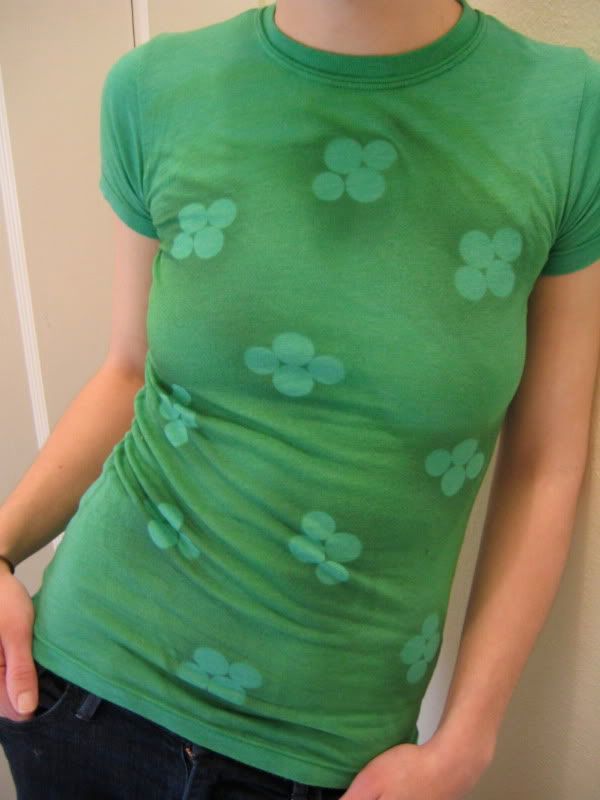
spare change makes sweet tees
Kelly's boyfriend hates all change except quarters, what he believes is the only "useful" coin. So day after day we watch him come home and pile all his pennies, dimes and nickels in a sweet vintage tin never to be thought of again. We could take the time to roll the coins and take them down to a bank, but what is the fun in that? So we decided they must go the crafty way! We grabbed a handful of change, some spray paint and got to work creating some homemade printed tees in three simple steps!!
All the how tos after the jump...
to a crafty month
March is officially the craftiest month of the year and we are just busting with crafty cheer. happy national craft month!! (sorry, we're just so excited) To help spread the homemade love, benny and I will be bringing you more awesome tutorials and a few giveaways of our own crafty creation throughout the month of March. So take some time to gather up a few friends and have a fantastic day/night of crafty adventures on us!
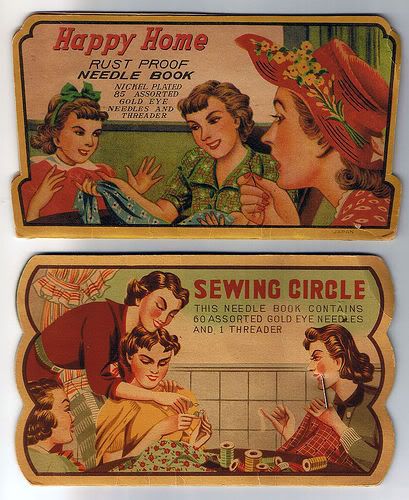
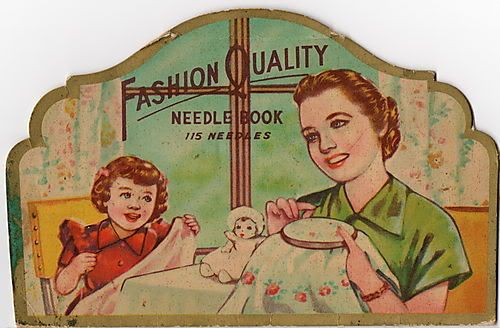
To get you in the mood...some sweet vintage needle books!
Wednesday, February 10, 2010
a little love makin'
To help you get ready for this weekend's love ridden holiday, benny and I will be sharing some crafty love with you all throughout the week! Let's start things off with some Candy Heart Tea Bags!!
So invite your "hot momma" over for a cup of tea in this rainy weather. We are sure they will find you irresistible!! How tos after the jump...
Step 1: gather supplies
Not much is needed really, most of which you probably already have lying about. Things to get...glue (any kind really depending on the material you plan on gluing here), scissors, card stock, bagged tea and any needed markers/pens/paints.
Step 2: cut out hearts
First, we need to create our hearts for the end of the tea bags. To do this cut out a template heart (make this one a real good one it is what all your hearts will look like) and then trace it multiple times onto your card stock. You will need two hearts for every bag of tea.
Helpful Hint: A good trick for cutting out a template that is symmetrical is to fold the card stock in half and then cut out half a heart with the folded edge acting as the middle divider of the heart.
Step 3: decorate hearts
Once the hearts are cut, it's time to color and decorate them, making them look more like candy hearts. We used spray paint as a quick and easy way to color the hearts to our liking. But you can color the hearts however you want with markers, paint, crayons, anything really!
And now for the very best part of this craft!! The part where you get to bring all your witty genius to the table, coming up with hilarious saying for your intended valentine. Although we have our talents, Kelly thought we were a bit lacking in the creative writing department, so we enlisted the help of our friends. They helped us to brainstorm a great little list of tea related love sayings, for your pleasure of course!
10 tea-tastic love sayings...
"U warm my heart", "steaming 4 you", "chai love U", "UR my sweetea", "steep in love", "honey 4 my honey", "boiling hot", "berry nice", "2 hot 2 touch", and "stir it up"
Step 4: gluing!
The next step is just putting all the pieces together. Take your glue (we used our trusty hot glue gun for this one) and bagged tea, remove the small paper square at the tip of the tea's string and glue a pair of your hearts together, sandwhich the end of the string between the two hearts. Once the glue sets you have yourself a custom tea bag!!
So invite your "hot momma" over for a cup of tea in this rainy weather. We are sure they will find you irresistible!! How tos after the jump...
Not much is needed really, most of which you probably already have lying about. Things to get...glue (any kind really depending on the material you plan on gluing here), scissors, card stock, bagged tea and any needed markers/pens/paints.
Step 2: cut out hearts
First, we need to create our hearts for the end of the tea bags. To do this cut out a template heart (make this one a real good one it is what all your hearts will look like) and then trace it multiple times onto your card stock. You will need two hearts for every bag of tea.
Helpful Hint: A good trick for cutting out a template that is symmetrical is to fold the card stock in half and then cut out half a heart with the folded edge acting as the middle divider of the heart.
Step 3: decorate hearts
Once the hearts are cut, it's time to color and decorate them, making them look more like candy hearts. We used spray paint as a quick and easy way to color the hearts to our liking. But you can color the hearts however you want with markers, paint, crayons, anything really!
And now for the very best part of this craft!! The part where you get to bring all your witty genius to the table, coming up with hilarious saying for your intended valentine. Although we have our talents, Kelly thought we were a bit lacking in the creative writing department, so we enlisted the help of our friends. They helped us to brainstorm a great little list of tea related love sayings, for your pleasure of course!
10 tea-tastic love sayings...
"U warm my heart", "steaming 4 you", "chai love U", "UR my sweetea", "steep in love", "honey 4 my honey", "boiling hot", "berry nice", "2 hot 2 touch", and "stir it up"
Step 4: gluing!
The next step is just putting all the pieces together. Take your glue (we used our trusty hot glue gun for this one) and bagged tea, remove the small paper square at the tip of the tea's string and glue a pair of your hearts together, sandwhich the end of the string between the two hearts. Once the glue sets you have yourself a custom tea bag!!
Show us what hilarious sayings and creative designs you come up with. We would love to post them!!
Labels:
bennykelly,
craftiness,
crafts,
handmade,
homemade,
valentines
Thursday, August 6, 2009
Friday, July 31, 2009
just made...
shades of yellow are very slowly taking over our obsession with shades of blue...
made with 100% recycled fabrics and stenciled with a design from our "southwestern series"!!
Friday, July 24, 2009
The Bazaar
Don't forget, saturday is the day Pretty Penny and the Parlour Gallery present the Craft Bazaar!! We are soo excited to be participating and can't wait to see all your smiling faces tomorrow. And to make things even more enticing we kindly donated one of our one-of-a-kind beer cozies to the bazaar's one dollar raffle!
So come to shop or come to win the raffle either way we would love you to be there!

When: Saturday!!
Where: Pretty Penny 5488 college ave, oakland
Participating Artists:
Wonderwear , bennykelly , Crooked Sister , It's Scrap , Queen of Hearts Apparel , Volta Press , kittinhawk , Pollyannacowgirl , Salvaged Beauty , Abeo Bestia Design , BirdversusBird Design
one dollar RAFFLE!
we will be having a raffle where you can win all these awesome prizes...
$25 gift certificate from SLASH DENIM
$25 gift certificate from VOLTA PRESS
custom made beer cozy by BENNYKELLY
fabric flower hair piece by CROOKED SISTER
leather earrings by IT'S SCRAP
handmade coin purse by BIRDVERSUSBIRD
Handmade brooch by SALVAGED BEAUTY
[caption id="" align="aligncenter" width="298" caption="you could win this at the raffle!"]
[/caption]
So come to shop or come to win the raffle either way we would love you to be there!
When: Saturday!!
Where: Pretty Penny 5488 college ave, oakland
Participating Artists:
Wonderwear , bennykelly , Crooked Sister , It's Scrap , Queen of Hearts Apparel , Volta Press , kittinhawk , Pollyannacowgirl , Salvaged Beauty , Abeo Bestia Design , BirdversusBird Design
one dollar RAFFLE!
we will be having a raffle where you can win all these awesome prizes...
$25 gift certificate from SLASH DENIM
$25 gift certificate from VOLTA PRESS
custom made beer cozy by BENNYKELLY
fabric flower hair piece by CROOKED SISTER
leather earrings by IT'S SCRAP
handmade coin purse by BIRDVERSUSBIRD
Handmade brooch by SALVAGED BEAUTY
[caption id="" align="aligncenter" width="298" caption="you could win this at the raffle!"]
Wednesday, July 22, 2009
recycled tags!
In our efforts here to be as sustainable as possible, kelly and I have been slowly overhauling the line for maximum environmental love! And one of the first makeovers we did was our ultimate handmade business cards. Drawing off that same idea, we decided the next step to green were more sustainable tags for all our goodies.
Now, all of our tags are handmade from handmade 100% recycled cardstock. And the best part is that kelly and I can now proudly say that every form of paper-based product we use is made out of recycled paper!
Labels:
bennykelly,
green,
homemade,
information,
recycled,
styles,
sustainability,
tags
Tuesday, June 2, 2009
recycled button coasters
Buttons are something kelly and I just seem to gather, from extras that come with new jackets/pants to random garage sale finds. We have always wanted to use them for some form of craftiness but could never quite figure it out. Then yesterday it just hit us...how cool would it be to create a cup coaster out of old buttons woven together?
These coasters are the perfect gift for a friend's birthday, father's day (which is just around the corner) or just to add a little handmade touch to your home! So start scouring for old buttons and get to craftin'! All the how tos after the jump...
Tuesday, April 14, 2009
Recycled Magnets!
Now that Earth Day and Mother's Day are just around the corner we thought we should bring you some nifty ways to use recycled goods for a crafty gift! Besides, what is more fun then gluing stuff together?
Benny and I are reluctant to throw out anything. So when we first sat down to decide what gifts to create, we really wanted to use up some of our stock piles. Our first thought was of our growing collection of used spray tips from our spray paints. They have a nice multicolor quality that we love and we have a ton of them! So after a little deliberation we settled on a gift that is simple, quick and totally customizable....RECYCLED MAGNETS!
All the how tos after the jump...
Monday, March 23, 2009
Homemade Cardstock!
Kelly and I were recently brainstorming on ways to incorporate more recycled products in the overall makeup of our line, while cutting costs everywhere we can (usually these two ideas don't go hand in hand...). In our brainstorming process we decided to do a housewide craft supply/material inventory to see what we already had. We ran around the house gathering anything and everything that could be used to create something, which rules out very little. Once we gathered our overwhelming pile, we soon realized we had an ungodly amount of old paper bags from all the different sorts of shopping we do.
Make your own cardstock...all the how tos after the jump!
Looking at all these bags, we just had to figure a way to use them. One of our biggest cost here at bennykelly is cardstock. We use it not only for all our tags and marketing fliers, but also as stencil paper. And as of recently we've been having difficulty finding cost effective cardstock made from 100% recycled paper. So to end our paper woos and bring more sustainability to our line, we decided to create some HOMEMADE CARDSTOCK!!
Make your own cardstock...all the how tos after the jump!
Thursday, February 12, 2009
Candy Heart Tea Bags
Our Next Valentine's Day gift is what we personally gave out to our friends this lovely holiday, custom heart tea bags! They are super easy way to create a custom gift and sure to please any tea lover. They can be made in no time, with little need in the way of supplies!
So invite your "hot momma" over for a cup of tea in this rainy weather. We are sure they will find you irresistible!! How tos after the jump...
Labels:
craftiness,
crafts,
gifts,
homemade,
tea,
tutorial,
tutorials,
valentines
Wednesday, February 4, 2009
trade recycled plastic for leather...
As you know we love textiles and reusing anything we can, so when a friend suggested that we try substituting leather with recycled fused plastic we were intrigued. We then learned that this "substitution" was a textile fabric you could easily make at home and we just fell in love!!
This fabric you can create is extremely versatile, being relatively strong (dependent on the # of plastic layers you fuse) and weather resistant. You can take a sewing machine to it with no problem and we have even been contemplating making a full blow rain coat! So in the true spirit of how we learned, here are the how tos to make this fantastically versatile homemade fabric...
[caption id="" align="aligncenter" width="483" caption="here is a sweet 100% recycled envelope we created with this lovely fabric!"]
[/caption]
tutorial after the jump...
This fabric you can create is extremely versatile, being relatively strong (dependent on the # of plastic layers you fuse) and weather resistant. You can take a sewing machine to it with no problem and we have even been contemplating making a full blow rain coat! So in the true spirit of how we learned, here are the how tos to make this fantastically versatile homemade fabric...
[caption id="" align="aligncenter" width="483" caption="here is a sweet 100% recycled envelope we created with this lovely fabric!"]
tutorial after the jump...
Thursday, January 22, 2009
back to work...custom color shoes!
We are finally back from our very extended holiday break and glad of it!! The parties are over and our 9-5's have finally slowed enough to let us breath, so we bring you some home craftin'.
We always have the hardest time finding a sweet pair of plain tennis shoes in that exact shade desired. The problem is we absolutely hate being limited to black, white or brown shoes and are limited in the funds to buy all the amazing shoes we see. So we came up with a simple solution that involves some cheap shoes and dye and tada...custom color shoes!

Custom Color Shoes!
We always have the hardest time finding a sweet pair of plain tennis shoes in that exact shade desired. The problem is we absolutely hate being limited to black, white or brown shoes and are limited in the funds to buy all the amazing shoes we see. So we came up with a simple solution that involves some cheap shoes and dye and tada...custom color shoes!
Sunday, December 21, 2008
Reusable garment stencils!
So the freezer paper has been fun and all, but what happens when you don't want to re-cut your stencil every few sprays/iron on appliqués? Or what happens when you want to use a previously cut stencil? Well we came across this amazingly helpful hint for sticking your stencil to your fabric while trying to figure out a way to silkscreen a huge stencil without a big enough screen frame. The best part is how easiest it is!
So there is not really a process to this just a few things to gather--acetate paper/mylar (or really any type of thin flexible fabric/plastic whatever your comfortable cutting into), a blank garment, spray paint and the secret ingredient, quilt basting spray!! Quilt basting spray can be found at any fabric store and is relatively inexpensive. There is no name brand to look for. I usually just go for the cheapest in the store. The spray is temporary, either washing away in water or, as the bottles says, "the adhesive properties will diminish or be completely removed after several weeks".
[caption id="" align="alignleft" width="160" caption="the spray we currently use..."]
[/caption]
Just use the mylar to create the stencil, adhere and let the paint spray!!
Helpful hints: First and foremost a little bit goes a long way with this stuff. If you use too much and you don't wash it off the fabric before putting it through a sewing machine it might muck up the needle. Finally, if you let the stencil sit for a moment to let the adhesive get tacky it will stick all the better.
Enjoy!
here is the life size stencil that inspired this trick...
So there is not really a process to this just a few things to gather--acetate paper/mylar (or really any type of thin flexible fabric/plastic whatever your comfortable cutting into), a blank garment, spray paint and the secret ingredient, quilt basting spray!! Quilt basting spray can be found at any fabric store and is relatively inexpensive. There is no name brand to look for. I usually just go for the cheapest in the store. The spray is temporary, either washing away in water or, as the bottles says, "the adhesive properties will diminish or be completely removed after several weeks".
[caption id="" align="alignleft" width="160" caption="the spray we currently use..."]
Just use the mylar to create the stencil, adhere and let the paint spray!!
Helpful hints: First and foremost a little bit goes a long way with this stuff. If you use too much and you don't wash it off the fabric before putting it through a sewing machine it might muck up the needle. Finally, if you let the stencil sit for a moment to let the adhesive get tacky it will stick all the better.
Enjoy!
here is the life size stencil that inspired this trick...
Labels:
craftiness,
fashion,
homemade,
spraypaint,
stencils,
tutorials
Subscribe to:
Posts (Atom)